Showing posts with label beauty. Show all posts

2 Dec 2013

Gem's November Favourites!


Cannot believe it is the start of December, mine and probably most people's favourite time of year!


However, I am here to talk about last months beauty offerings that I could not keep out of my make-up bag, shower, hand-bag... you get the idea :)

First off is a bit of a splurge item
https://blogger.googleusercontent.com/img/b/R29vZ2xl/AVvXsEhuNed0urcwDgNtEpkOkx6sorF0006IptiOCpBp6gfWwqbw84MJEh2uLFA80oCNclBgLuxb0vQGQWNhlOmZJWE4QIuWc9K1xDatc4I5W_fR79hwWB_LBLPBLJOj50wIK4s7m3wn4AeIjZR1/s1600/jouer+3.jpg
It is the Jouer Matte Moisture Tint. I purchased this off www.cultbeauty.co.uk. It was 30 pound which is equal to about 36 euro, you do get 50 ml of product though which is a pretty decent size. This product is oil free which is perfect for my oily skin and also has an SPF of 15. It has nearly a gel like consistency. It has a decent amount of coverage for a tinted moisturiser and goes on smoothly with hands or a brush, depending on how much time you have. I find it stays on my skin well (with powder) throughout the day. I purchased the shade linen. My shade in MAC would be NC20.

My next fave is the Rimmel Wake Me Up Concealer.
                                               http://images.littlewoods.com/is/image/Littlewoods/prodDetailMain-300x400/rimmel-wake-me-up-concealer-classic-beige%7CB218P_SP724_89_27V5H.jpg   
I feel I am late to the party on this one, as I know many people have tried and loved this product. I bought it on a whim on my lunch break in the local chemist (6.99 euro) and it can be found in most chemists and Boots. It has a doe foot applicator, which isn't my favourite way to use it from a cleanliness point of view, I usually decant onto the back of my hand and use a brush to apply it. I love using this under my eyes. I find it creamy and very easy to blend and does a good job of covering my lovely bags of a morning. I use the shade 010 Ivory.
   
The Real Techniques Expert Face Brush is another one of my favourites this month.
http://10ambeauty.com/wp-content/uploads/2013/01/Real-Techniques-Expert-Face-Brush-side-view1.jpg
 This brush is great when you are in a rush (which I always am). I use it for primer, base and concealer. It's big enough to get your base done quickly but small enough to blend concealer under your eyes and anywhere else you might need it. It is a dense brush too so it doesn't swallow up all the product. I think I might have to buy a back up. It retails in Boots for approx 13 Euro.


As the festive season is fast approaching I had to add in my favourite red lipstick of the moment, however it doesn't have to be Christmas to rock a red lip :)
https://blogger.googleusercontent.com/img/b/R29vZ2xl/AVvXsEhlTS4ldxk4pvK-lZU4Dr_CsrA05tFd7zkdIhQZuLYqwcNNMITZrykl4kusHzvaed-zgTnrT4wsnp-VqBdpSQlfffHA0n4DNPklSnZ3uNFxIhhOAXv1VSXaXpp7mtSA9smD3HHmh2Qj0ets/s1600/RiRi+Woo+Lipstick.JPG
I was a complete sucker and bought RiRi Woo in the rose gold packaging (22 Euro) from www.brownthomas.com It is a a beautiful matt red that's not too drying on the lips if you give them a good scrub and a good coat of lip balm before hand. It makes your teeth looks whiter which is an added bonus! It can be used straight from the bullet for a full on red lip or if you want a toned down effect apply a small amount to your lips and rub in with your finger for a more diffused but still beautiful look.

Something that I cannot keep out of my shower at the minute:
http://beaut.ie/wp-content/uploads/2013/04/IMG_8841.jpg
 The Nivea In Shower Body Moisturiser.
Here is a full review of this product if you want to check it out on our blog.
You can get this in most chemists and supermarkets and if you're lucky Boots  have it on special alot, for about 4 Euro It usually retails for about 6 Euro for the large size!
I have oily skin. I am in my late 20's and still get zits on my face, like a 16 year old. My body however gives me mixed messages, some of it wants to be oily, some of it likes to be dry. The Nivea In Shower Moisturiser helps my bipolar skin. You use on wet skin in the shower after washing and all that good stuff. You lather it on,wash it off and then dry as normal. I then use normal moisturiser on the parts of my body that need it more!

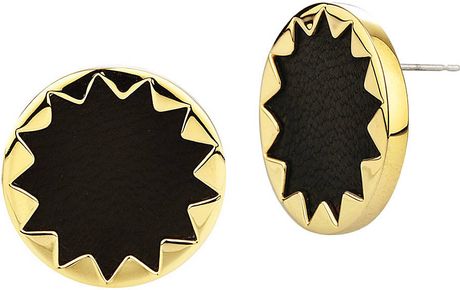
Finally, these have been a fave of mine this month (since I only bought them this month :) )
http://cdna.lystit.com/photos/2013/06/13/house-of-harlow-black-sunburst-button-earrings-product-1-10772337-961956451_large_flex.jpeg
                                      http://thumbs1.ebaystatic.com/d/l225/m/m_1JMzH2rnoPxAWqje9UleA.jpg                                       
They are House of Harlow Sunburst Button Earrings. I bought mine from www.shopbop.com. They cost me around 25 Euro with tax and shipping which I thought was pretty reasonable.They are a medium disc earrings designed by Nicole Richie (daughter of Lionel), with faux leather inside the sunburst. I've had my eye on them ever since I saw Heart from http://www.youtube.com/user/ThatsHeart on Youtube rocking them.They are really good quality, can be worn casually but for me I think they will be kept for special occasions.

So these are some of my loves from the month gone by. Hopefully you'll enjoy reading it as much as I did writing it.

Thanks and enjoy all of the Christmas build up :)

Gemma
 xxx                                                                                                                                                                           


11 Nov 2013

TAG: My desert island beauty products

I am surrounded by beautiful makeup and beauty products all the time and am constantly updating my collection with the newest releases! But what products could I not "live without"??? In this post I will give you the answers while at the same time give you an insight into why I find these products so fantastic. 


So here we go, I have categorised this to make it an easy read...if I don't have a desert island product I will simply not put one in this post.......honesty is the best policy after all!!

Favourite Face Primer: Has to be hands down Benefits Porefessional. I have bought tubes of this stuff and always go back to it. It really smooths out my complexions and makes my makeup last all day

Favourite Foundation: Do you have to ask?? Of course its Rimmel's Stay Matte Liquid Mousse Foundation (review here). I honestly cannot find a foundation as good as this and I have tried really high end products. This is definitely the best beauty find of 2013 for me.

Favourite Face Powder: AHHH Mac's Mineralized Skin finish natural. Leaves your skin flawless and perfected looking.

Favourite Blush: Very easy for me. Mac's Melba Blush. This is just the perfect peachy toned blush that looks amazing on everyone. A staple in anyone's collection I think.

Favourite Bronzer: I like many powder bronzers but one product that stands out to me is a cream based product and it is Boujours Bronzing Primer (Review Here). No matter how much or how little makeup I am wearing I always use this. It just adds a subtle warmt to the face that makes even the palest skin look naturally bronzed. 

Favourite Highlighter: The Balms Mary Lou Manizer. This is by far the nicest highlighter I have used. It gives your skin a glow but without looking overly glittery. A little goes a very long way so be light handed with this one!

Favourite Lipstick: Sarah G Cosmetics in 107 Pink Lady (review here). This to me is the perfect shade of pink and lasts so long on the lips.

Favourite Lipgloss: Mac's Cultured Lipglass. This paired with Pink Lady by Sarah G is my go to lip combo. Amazing pout at your finger tips.

Favourite Fake Tan: Oh this is a tough one. Its either between Karora's express bronzing mousse (Review here) or Cocoa Brown's 1 hour tan. (Review here) Both these tans give you a beautiful glow in a matter of hours and are so easy to use. Sorry but I cannot choose between these.

Favourite Body Scrub: I have never tried a body scrub so effective as Cocoa Brown's Tough Stuff (Review here). This is remarkable and doesn't leave any residue on your skin which to me is essential if you want your tan to be impeccable!

Favourite Perfume: Paco Rabanne Lady Millions. Everyone comments on this scent when I wear it. It's beautiful for every occasion I feel. If you haven't tried this you are definitely missing out.

Favourite Face Palette: Sarah G's "Face Kit" is a definite winner in this category (Review here). The blush and bronzer are some of my favourites and the eye shadows are perfect for creating a soft look or a more dramatic evening look. 

Favourite Eyeshadows: Urban Decay's Vice 2 Palette. This has everything you need for a day time look or a more colourful smoky eye. If all my eye makeup disappeared and I had to repurchase one product it would be this as it has every colour you would need for any occasion.

Favourite Eyeliner: In general the Inglot Gel liners are amazing and in particular no 77 (Black) and 90 (Brown). I wear one of these two almost every day.

Favourite Brow Product: MUA Pro Brow kit. This is so reasonably priced and has everything you need for perfect brows. 

Favourite Tool:  Shu Uemera eyelashes curlers. I never thought curling my eyelashes was so important until I used this. It transforms the look of your eyes and makes you look bright eyed and beautiful.

Well I think that is it for now!! I called this post my desert island products but I would need a suitcase for just these items if I was going to a desert island but you get the idea!? These are the products that are and have been staples in my collection for awhile and that I would repurchase over and over again.

What are your desert island products? What products could you not "live without"??? Leave a comment below.

I TAG ANY beauty blogger out there who is as much of a beautyaholic as I am! Leave a link to your blog down below. I would love to see what you are loving and get some recommendations on new products to try. Also please feel free to add in some products. I just left some out, like concealer and mascara as I haven't yet found my desert island products.

Have a wonderful day everyone. 

Anita xxx

7 Nov 2013

A Guide to Choosing the Right Concealer

Hey Ladies! In the past I have done blogposts on How to choose the right foundation and also the Right Tools for Applying Foundation.This next post will deal with concealers and how to choose the right one for you and also how to apply them. Hope you enjoy and find it helpful!

A lot of people are under the illusion that foundation is the way to cover up imperfections and this is why we see many girls with caked on makeup which infact draws attention to the problem areas rather than masking them. It is true that foundation does help to even out skintone and reduce some redness but for really prominent blemishes and under eye circles concealer is our skin savior. Concealers are specifically designed to deal with problem areas and when used correctly they can transform your makeup look. They are also great as they give you full coverage without having to use too much makeup.

There are TWO Types of Concealers. One for under eye and one for covering blemishes on your face.
Credited to Bobbi Brown Cosmetics
UNDER EYE CONCEALERS: These are used to conceal discoloration and dark circles. It is designed to work with the very delicate skin around the eye area. They should be light and creamy in texture. It should also be subtle and hydrating as the skin under your eye tends to be drier and thinner than elsewhere on your face. There are two types of under eye concealers. The first one is a light reflecting one which instantly brightens the area while the other is for hiding discolouration. A lot of products on the market can do both and these are the products I would recommend.

CHOOSING THE RIGHT SHADE FOR YOU: The trick is to find a concealer that is light enough to brighten the eye area and conceal your under eye circles but not too light that it will not blend with your skin tone. I would suggest getting a concealer one or two shades lighter than your own skin. In normal circumstances choosing a yellow based under eye concealer will cover discolouration and brighten the under eye.

APPLICATION: Depending on the type of product I am using I would use different application techniques. For products that come in pumps or tubes I always put the concealer on the back of my hand, this not only warms the product before application to the skin but it also allows you to control the amount of concealer you apply to the under eye area. I would recommend using a concealer brush or even your finger (be very delicate) to apply the product. If I am using a concealer wand such as YSL Touche Eclat I would apply the product directly from the wand under my eye and dab in with my ring finger. You do not want too much product under the eye as it will sit in fine lines so I would recommend multiple light applications rather than one thick application. When applying concealer apply to the undereye areas, including the inner and outer corners of the eye. You should always set your concealer with a really light dusting of powder to set the eye.

QUICK TIP: If your under eye concealer has light reflecting particles in it do not use this to cover blemishes as it will only draw attention to the area rather than covering it.


MY FAVOURITE CONCEALERS FOR UNDER EYES: Both Makeup Forever and Mac do a great range of concealers light enough to use under the eye area. Liquid Lift by MUFE is excellent and I also love Mac’s Pro Long wear(this can be used for blemishes also but make sure the colour matches your skintone if you use it to cover blemishes). Bobbi Brown's Correctors are fantastic if you have discolouraton under thr eyes. Refer to my previous post on how to treat and hide dark circles for great little tips. A cheaper alternative would be Maybelline’s DreamLumi Touche concealer wand or Collection 2000’s Illuminating Touch concealer. I am also a big fan of Maybelline's Age Rewind Concealer.


CONCEALERS FOR BLEMISHES ETC: These are used to cover pimples, veins, redness, broken capillaries etc. and are thicker in consistency and can often be much drier. Its recommended to try find a concealer for problematic skin if you are suffering from ache etc as they will have antibacterial properties in them which will not only cover the area but will treat the underlying problem also.

CHOOSING THE RIGHT SHADE FOR YOU: Unlike the undereye concealer this type of concealer should match as close as possible to your natural skin tone. It’s a good idea to buy the same colour or as close as possible to your foundation. Often makeup brands have the same colours in foundations and concealers which makes it easier for you to choose the right shade. If not you can use the tip for choosing the right foundation in my previous post(Link at top) .

APPLICATION: This really depends on the size of the area you wish/need to cover. The application is very similar to before. Apply the product to the back of clean hands to warm the product. Take some product up on the brush and wipe off excess. Light multiple applications is a must as otherwise you will have a very clumpy area which makes the area more noticeable than before. For small areas like pimples, veins etc. use the tip of the brush and dot or draw on the area as delicately as possible. For medium sized areas use the side of the brush and for larger areas I would recommend using fingers. This is great to cover any areas of rosacea or pigementation. When using the fingers push the warmed product into your pores with your fingers.

QUICK NOTE: If your blemish concealer is thick in consistency do not attempt to use this under the eyes as this area is too delicate and thick consistency makeup will sit in the fine lines under the eye causing the makeup to crease. This is not a good look. 


MY FAVOURITE CONCEALERS FOR BLEMISHES: I like Revlon’s Photoready concelealer (this product is ok for use under the eye also) , Rimmel Hide the Blemish Concealer,MUFE  or Ben Nye Concealer palettes or Laura Mercier's Secret Camouflage Concealer.

So that’s all folks. I hope you found this helpful and please feel free to contact me with any questions you might have and be sure to let me know what you think of my post.
Thanks everyone and stay tuned for the next post which will be on how to choose the perfect powder.

Love Anita xxxx

10 Sept 2013

Sarah G Cosmetic Product Review

Sarah Mc Gough is the creator and owner of Sarah G Cosmetics. She is Irish born, living in the UK. I have been a fan of Sarah as a makeup artist for awhile now and have lusted after her products for ages.  So I decided to treat myself after my exams to some of her products. I emailed Sarah and asked which she thought was the most popular products and she very promptly replied to say that "The Face Kit" was by far the most popular and also her mascara and lipsticks were great sellers. So I decided to give them all a go.
Shipping was very fast so I got my products in no time and was dying to try them out. I have them several weeks now but really wanted to give them a thorough testing before I let you all know my thoughts on them. 


Let me start with my favourite, "The Face Kit". It is a really cute little black compact that contains four eyeshadows, a bronzer and a blush. The four shadows are all shimmery and come in the following colours, a champagne colour, a yellow gold, a dark brown with a goldish shimmer and a beautiful charcoal grey. The bronzer is matte which to me is an essential for contouring and the blush is the most amazing shimmery pinkish coral colour. The compact also consists of a large mirror (the full size of the compact) and some brushes which if I am honest I threw away because I don't like the little brushes that come with compacts, I would much rather more product than brushes because I could sell brushes at this stage, but I am sure others would definitely find them useful.


I used "The Face Kit" on the eyes here and also the bronzer and a very small amount of the blush on the cheeks!

I love the choice of colours in this palette. I feel they would be perfect for a simple day look or for a more sophisticated night time smoky eye look. The only thing I did find missing from the palette was a matte brown shade for the crease but me being one for experimenting I used the matte bronzer in the crease as a blending matte shade and it works so well. I actually love the colour as it has a slight reddish tone off it with really compliments my eye colour (you can see this colour in the picture above, just slightly blended over the dark brown shade to add transition from dark to light). The pigmentation of the eyeshadows is amazing. They have fantastic colour pay off and are so creamy to touch and blend effortlessly. The shade I love most is the champagne shade which I love for highlighting under the brow bone and in the inner corner of my eyes. I also adore this for highlighting my cheek bones. These eyeshadows definitely give the more expensive, overpriced brands a run for their money. The bronzer is the perfect shade, its great for contouring but is equally as nice for adding a bronzed glow to the face without looking in any way orange! I am definitely going to have to see if this comes in a full size because I am mad about this product and would love it as a separate compact. And the blush.....what can I say, its just a really pretty, just pinched colour that adds a luminosity to the cheeks. 

TOP left bronzer, right blush. MIDDLE all shadows in order as above and BOTTOM is the charcoal used with damp brush as liner.

I would suggest using an eye shadow primer with these shadows to ensure that they last all day. I have had no issues with them not lasting but I always recommend using a primer with shadows that are very soft in texture as they tend to crease easier on the eyes. The charcoal colour tends to be a little more chalky than the others so a primer will sort this out, also I found wetting this colour works very well as an eyeliner. This "Face Kit" can be purchased for £25 or €29.72 which is amazing value for what you get in this kit.

In my eyes this palette is perfect for travel or for putting in your handbag as you have everything you need for a daytime or evening eye look. You have a bronzer, a blush and a  facial highlighter (the lightest of the eyeshadows)....if you took this on your holidays you would have your eyes, and face completely sorted. All you would need is foundation, powder, lipstick and mascara and any other little extras you might want to bring along with you. 

My next purchase was one of the lipsticks in the shade "107 Pink Lady". This is in my eyes the perfect pink shade of lipstick. I adore Mac's Creme Cup and Chatter Box lipsticks but I find one too light and one too deep sometimes for everyday wear. Pink Lady by Sarah G Cosmetics is a mix of both of these shades. Its not too pale and not too bright, its a very wearable and pretty pink shade. The formulation is creamy and has a lovely sheen to it again making it very easy to wear. Its a very opaque colour which is great because the colour that's in the tube is what you will get on your lips, nothing worse than a lipstick that looks good in the packaging but not as nice on the lips. I would recommend to use a very light coat of balm before applying this as it tends to dry my lips ever so slightly but on the plus side the dryness allows the product to last much longer on your lips than non drying formulations. Sarah G lipsticks are £8 or €9.51.


Sarah G Cosmetics Lipstick Shade 107 "Pink Lady"

I also purchased the "Superlash" Macara in black. I love big wands on mascara as I think they give great volume and this wand is right up my alley. The only problem with this is that its very hard to get in the inner corners of the lashes and also the bottom lashes but I have mastered a technique. When I first got this mascara I found it was very wet and kind of hard to work with because it seemed to clump on the second coat because it was so wet. So I decided to leave it for a few days and go back to it and when I went back to it I was very happy to find that it dried out slightly and now it is much easier to use and I love using it now. The wand really helps add volume to the lashes and it gives great length too when you build it up. It clumps a very small bit but nothing that cannot be sorted by brushing the lashes through with a lash comb. I really like that this mascara is black black and so adds depth and drama to your lashes. A great buy in my eyes! This mascara is £12 or €14.27. 

Sarah G Cosmetics Superlash Mascara in Black

I did also get some glitters and glitter fix but I haven't really used this much but plan to use them alot in the Autumn/Winter so I will be sure to let you all know what I think of them. 

Overall I am very happy with my purchases and I even included "The Face Kit" in my August Favourites as really thats the only thing I reached for when doing my eyes, contouring and cheeks for the month of August...that must say something in itself. All products can be purchased from Sarah's online store or you can visit Sarah G Cosmetics on Facebook. Sarah is so professional and so helpful so if you have any questions for her be sure to ask. She is also a makeup artist in the UK so if you are following my blog from there be sure to check her out the next time you need your makeup done professionally.

I am really excited to see what else Sarah has to offer and will definitely let you all know of any future purchases. 

Have a wonderful day and Love to you all xxxx

17 Aug 2013

I got ZINCed and Loved it!!!


When I was invited to Zinc Hair & Beauty to try the Cocoa Brown Spray Tan by Marissa Carter and 3D Browz of course I was only delighted to give the treatments a go and even happier that it was at Zinc Hair & Beauty because I know how friendly and highly skilled the staff are there.

Zinc Hair&Beauty 637 South Circular Road.

When I walked in I was pleasantly greeted by the owner Lisa who was busy with a client and she asked me to take a seat and Tanya, the girl who would be looking after me today would be with me shortly. I was only seated and Tanya took me into the treatment room where she explained that she would do my 3D Browz treatment first and she asked me to lie up on the treatment bed. Ahhhh finally I can relax!!!!! Tanya then assessed my current brow shape and asked me what type of shape I would like and what colour tint I wanted. She also recommended that she gives my brows more definition. I knew I was in capable hands so I told her to do what she thought would suit me best. She then applied the tint and left it settle for a few minutes. Except for a split second Tanya didn't leave the room while the tint set which I thought was great because we got to have a chat about the Decoderm makeup that Zinc stock and use in the salon (review here) and she also was telling me about the new range of Decoderm nail polish that they got in in the last couple of days. I found her very easy to talk to and interesting at the same time which to me is so important when you are spending time alone with someone.


When the tint set Tanya then advised that she would wax, thread and trim my brows to the shape which would best suit me. Tanya was super quick at this and so the treatment was virtually pain free (even the threading which I don't particularly like). Once that was all done Tanya then wiped my brows and applied some sort of liquid (sorry not exactly sure what) which I think maybe sealed in the brow colour. She then showed me the finished result in a mirror and I have to say I was delighted. They looked much more defined and even though I had zero makeup on and I was as white as a porcelain doll I didn't look too bad because my face had definition. I was really delighted. I was very happy to see that the colour wasn't too dark and it blended well with my hair colour because for me their is nothing worse than having two huge thick, dark brows that just look like caterpillars on your face.

 Tanya did explain though that everyone has one eyebrow that can cause problems and needs more work and mine is my left one (don't I know it, it has caused me problems for years) so she explained that I should come back every six weeks and get them done and she will work on the shape and get them more uniform. I will definitely be doing that!!! I am a perfectionist and can see that my left brow is slightly thicker than the right and it will bother me for awhile but I have to take the advice of Tanya and trust her that by regular treatments this will be rectified over time. 3D Browz cost €30 per treatment at Zinc and they recommend you get the treatment done every 6 weeks to get a perfected result.

Brows Before being 3D Browz'd

After being 3D Browz'd

Next Tanya brought me into the room for my spray tan and told me that there was a hair net, disposable undies and some moisturiser to use if I felt I had dry patches. Seriously, does any other salon give you that much care??? None that I have been to anyway. So Tanya left me to get ready to be sprayed. When she came back in she asked how dark did I want to be and I said as dark as possible and she explained that like the Cocoa Brown 1 Hour tan the longer you leave it on the darker it will be. So she suggested leaving it on for 3 hours and then just giving it a light rinse and moisturise well. When Tanya finished spraying my whole body she then went over my legs a second time. I was taken back by this but thrilled because we all have had experiences where the tan takes beautifully all over the body and not on the legs so Tanya explained that by spraying them twice that this wouldn't happen....Hooray, its like she read my mind. Before I got dressed Tanya gave my skin a quick blast with a hairdryer to make sure I was dry all over(again another first for me)...although there was very little drying needed because the tan seemed to soak into my skin instantly.


The tan itself had the usual Cocoa Brown smell of Tahitian Gardenia (review of 1 Hour tan here) which is so pleasant rather the usual disgusting curry smell of other fake tans. The colour itself was almost instant, I felt I could go out on the town without even rinsing it off. A great thing when you have to go out in public after getting sprayed!! When I was on the way home the tan did start to run on my arms and legs which freaked me out a bit but it didn't make any difference at all so I would say this was only the colour guide running. The tan developed in an hour and I could see it getting darker up to the three hours after when I washed it off. I LOVE the colour of the tan, its dark enough but yet looks so natural. There wasn't a streak in sight (except for a tiny bit on my palms and bottom of my feet that shouldn't have been there...think this was my fault) and even the rougher areas like my ankles, knees and elbows were all perfect. This is down to the great work of Tanya and also the fact that I prepped my skin the night before with Cocoa Brown's new Tough Stuff body scrub (review here) which is available from Zinc for €3 for a 50 ml Sachet. I love the lack of fuss around this tan, you go in, get sprayed, get dressed almost instantly, have no sticky residue and wash it off after three hours (or one hour if you want a lighter tan) and you have perfect, streak free tan that lasts for days. It costs €20 to get a Cocoa Brown spray tan at Zinc.
Before                 After application      3 Hours later

Overall, my trip to Zinc Hair & Beauty was very pleasant, I got amazing services with impeccable results and got to meet some lovely people and try some great treatments along the way. I was so happy to have been ZINCed and plan on making it a regular place to visit to be beautified. Thanks for having me ladies and see you soon!

You can visit Zinc's website for more information on their staff and services they offer. http://www.zinchairandbeauty.com/

Love and Kisses
Anita xxxx


28 Jul 2013

July 2013 Beauty Favourites

So what have I being loving this month? Well because of my June trip to London I have used alot of new products this month and cannot wait to share them with y'all! Because the weather was so nice this month I tended to opt for a more natural look. Concentrating on flawless skin and leaving my eyes to speak for themselves I was all about the creamy, shimmering and summery products this July. Oh and there seems to be a little trend amongst some of my fav's....Inglot addict maybe?


So let me start with the skin,
I am literally obsessed with Laura Mercier's silk creme foundation since the day I used it. Its oil free so doesn't create a shiny mess on my T zone which is a massive plus. It is so pigmented that a tiny bit goes very far but even though its full coverage it doesn't look cakey, it leaves a fab natural radiance to the skin. If you haven't tried it please pick up a sample when you are next at a Laura Mercier counter....you will fall in love!

To apply this foundation I am loving my beauty blender (which is too full of makeup to photograph today). The girl at the counter where I bought my foundation said its best applied with a sponge and she is right, it glides on effortlessly with the beauty blender and never looks made up. I do have a love hate relationship with the beauty blender though because I feel its a germ fest but yet it applies foundation and concealer effortless and flawlessly.....I will just have to wash it daily to keep germs at bay.....well worth it!

I have pretty dark circles under my eyes and find it difficult to find a decent concealer but I recently rediscovered the Inglot Cream Concealer (shade 67) in my kit and decided to give it a whirl. I use the pointed end of the beauty blender to dab the product under my eyes and I have to say the results are super, good coverage, not cakey and doesn't crease...happy days!! I am also using this concealer to cover some blemishes although I don't need much now that I am using the LM Silk Creme Foundation!!

The non creasing could also be down to my new favourite brush and powder for my under-eyes. After applying the concealer with the beauty blender I then use the Blank Canvas Cosmetics F23  pointed tip face brush to apply my powder. This brush is fab, it really allows you to get the product right in the corners and it just fits so comfortably under the eye...its like it was made for it. I like to pair this brush with the Ben Nye Banana Powder. This is a cult favourite and used by makeup artists worldwide. Its basically a yellow powder than is light enough that it doesn't dry out the under-eye but because of its colour it will help counteract any darkness...the difference is subtle but I love it.

I bought alot of Inglot products in London and my fav blush from the ones I bought is Shade 68. This is a coral colour that is fab for this time of year and looks super with a tan (although mine is fake at the moment). I just feel this blush goes with every makeup look and just adds a beautiful burst of colour to the face. I love the texture of the Inglot blushes. They are not chalky and are really pigmented and very reasonably priced too.

I've been loving two Inglot eye products this month and the first one is AMC Pure Pigment Eyeshadow in shade No 14. This is a light neutral creamy peachy colour. I just love to apply this on my lid with some soft matte browns in the crease and its really simple but adds a little something to the eyes. I also use this as a cheek bown highlighter, it is very finely milled so it is not glittery or heavy on the skin in any way.

To blend out the matte browns in my crease I am loving the Mac 217 brush. It is the best blending brush I have used to date because it just makes blending out your crease colour effortless. Every makeup artist or makeup enthusiast should own one of these. I think I own three at this stage.

I also love Inglot gel liner in 82. This is a bright blue liner. I love to wear blue eyeliner in my waterline to give my eyes a little somethin somethin. It makes my eyes pop and this one in particular is a fab shade and lasts all day long. If you are in the market for a new blue liner you should check this out. In general the Inglot liners in my opinion are the best on the market. They are very reasonably priced at €15 and are definitely waterproof. Love them so much and have alot in my collection.

I opted for a neutral pink shade on the lips for most of the month and the lipstick I have used most often is MACs Creme Cup. Fab colour, fab consistency what more could you want. I top this with Boots No7 BB Lips in Blink Pink to give it that little bit extra and also to protect my lips from the sun as the BB lips has SPF 15....great little product

To take all my makeup off at night and refresh my skin I am obsessed with the Loreal 3 in 1 Micellar Solution. It's basically a cleansing water that removes makeup including mascara. It really is a marvel product. I love double cleansing so I will use this to remove most of my makeup then I will use a face wash and my clarisonic to remove the rest. I don't think this product is enough to remove all traces of makeup, or maybe it is but you would need a hell of alot of product!! I have definitely noticed I am not breaking out as much since using this and so this means that it really is thoroughly cleansing the skin while being uber sensitive and gentle on the skin. Definitely worth a go.

Well thats all my July favourites. I hope you found this interesting and hope you go away with some extra info on some great tried and tested products out there on the market...trip to Inglot anyone???

Be sure to let me know by commenting below what your favourites were for the month of July, I would love to know and maybe try some in August.

Have a great day whatever you do and be safe xxx

3 May 2013

April 2013 Beauty Favourites


I was loving a heck of alot of things for the month of April but alot of them were towards the end of the month so I think I will leave some of them until May favourites as I have no doubt I will be loving them this month too. Although my April favourites do consist of some fanatastic products that I am obsessed with at the moment


I have to start off with my favourite product of April. Thebalm's Mary Lou Manizer is the best highlighter I have ever tried...period. This gives the most amazing champagney golden highlight to the skin without looking overly sparkly or glittery. Its stunning for skintone and for any occassion. This cost me €18.75 from FeelUnique and I have to say its the best money I have ever spent. I love to apply this to the top of my cheekbones and under my browbone for a real natural but noticable glow to the skin. Let me know if you would like a more indepth review on this.


Dr. Jart+ Waterfuse Beauty Balm is an absolute favourite of mine. This will remain a staple in my makeup collection for a very long time. Check out my full review on this little beauty. 


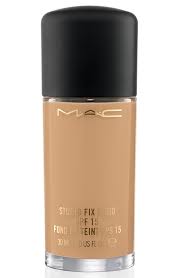
Oh what can I say about MAC Studio Fix Fluid. This has saved my life (well not literally) in April. I rediscovered this recently and cannot believe how much coverage it gives me and how long it lasts on my skin. I think this is around €31 from any MAC counter. I am shade NC20 without tan or with a light tan. I am having acne breakouts at the moment and people keep telling me how well my skin looks. If only they could see whats under my layer of MAC studio fix fluid!!! I love to pair this with the DR Jart BB Cream for a beautiful fresh face that covers well but doesn't look cakey. 


To set my face of makeup and keep it in place all day I love to use Urban Decay's all nighter spray. A few light sprays gets rid of that powdery look to your skin but yet keeps your foundation locked in all day. I also love to use this during the day to freshen up my makeup. I have definitely noticed a considerable difference in the length my makeup lasted after using this. This product is between €23-€28 depending on where you purchase it from. I find Beautybay is the most reasonable and they offer free shipping. Urban Decay also offer other setting sprays for different skin types including one called De slick which is for oily skin. The all nighter tends to work for my normal/combination skin but I know people who have oily skin and swear by the De slick version so be sure to check out the full range before purchasing.


Daniel Sandler is a well renouned makeup artist with lots of celebrity clients under his belt. I have been a fan of his makeup for many years and his watercolour blushes have to be my favourite. They are a water type blush that is applied to the apples of your cheeks to give a beautiful flushed look to the skin. These blushes are very natural looking but really add that wow factor to any makeup look. I have four of these blushes and plan to buy more soon. If you would like to see a more indepth review on these let me know. You can purchase them from Beautyemporium.


In April I found my favourite mascara of all time (well so far anyway). I was and still am in love with Clinique's High Impact Mascara in Black. This gives my lashes so much volume without clumping or looking spidery. A great mascara that doesn't flake and adds depth and intensity to your eyes, what more can I say!! Oh yes the price, this mascara will set you back €19.50 and is available at any Clinique counter. 


Another Clinique product I am loving is the Chubby Sticks Moisturising Lip colour Balm especially in shade Whoppin' Watermelon. This is a great little lip product that is easy to use and adds a really lovely sheer but noticeable shine to the lips. I love this for everyday use. They are also very moisturising on the lips. This product is €19 from any Clinique counter.


I am still loving the Karora self tan mist. This gives me such a beautiful tan without any streaks and is effortless to use. Check out my review for more details. 


And last up is my favourite haircare product of the moment. Its the cult Moroccanoil Original. I am obsessed with this stuff and start to panic when I forget to put it into my hair as I know my hair just won't be quiet right without it. I apply this to damp hair after I wash my hair or sometimes I use this to defrizz my hair after blowdrying it. It takes the frizz away very easily and doesn't weigh your hair down at all. There are many oils on the market that are trying to outdo this but in my opinion there is nothing that can beat this little beauty. This is an expensive product (around €40 for a 100ml bottle) but its an investment as your hair will definitely be less dry and much healthier looking with this. 

Well that's what I have been loving in April and am still loving today. If you have any favourites that you are loving please let me know as I am always in the market for trying new products.  Also if you want an indepth review on any of the products above please let me know. I hope you found this useful and thank you for taking time out to read this. Big Kisses and have a fantastic LONG weekend.  XXXX


20 Apr 2013

My Current Fake Tan Favs!!!

My busy schedule doesn't allow me apply fake tan every two to three days, or maybe I am just too darn lazy to do that so when I look for a tan I want something that's easy to apply, doesn't streak, gives me a goddess glow and fades off evenly so that I don't look like I haven't washed in weeks (not the look I am going for right now). Impossible I hear you say???? Well......actually I think I may have found the "perfect" tanning products......Drum Roll please!!!!!!!

Introducing Karora Self Tanning Mist and Clairns Liquid Bronze self tanning for Face and Decollete.These two little babies are great products and have not yet failed me....I have used them both for a long time and I have NEVER even had a lickle streak from them....not even once!! That must be a first for me!!!! Want to know more??? Ok, lets be having ya!!


For a natural, sunkissed glow I use Karora Self Tanning Mist Original on all parts of my body (apart from my face and neck.....we will deal with that later). At first I was sceptical because I had only ever tried cream or mousse type tans. Karora Mist as the name suggests is a lightwieght Liquid Mist! Karora claims that this mist is a tan that "glides on skin effortlessly, dries instantly and delivers an even rich golden tan lasting up to 7 days" I would have to agree with this, I am amazed at how quick this tan dries in. It reminds me of the feeling of a spray tan and I have to say it looks like one too. Everytime I apply this tan it looks like a professional beautician has applied it as I am streak free and evenly tanned. What more could you want??? Well if you are fussy like me you would want more and guess what Karora gives us more... Not only does it have skin firming benefits but it is "fused with a propritary blend of pure active botanicals, vitamins and essentials oils of Acai berry and Argan". So a botancial based tan with skincare benefits, that keeps you glowing for days, that doesn't streak, has sleek and sassy packaging and best of all is Irish made, seriously there is nothing else to say. Karora has it sorted!!!

The instructions advise to use rubber gloves and blend the tan into your skin in circular motions. Although I do agree with the latter I feel the best way to apply this is with a tanning mitt. I have done this right from day one and have never had a problem. Karora also state that this product has a delicate fragrance which it does however unfortunately like all products that contain DHA (what makes the tan develop) there will be a slight pong...but its not half as bad as other tans I have used.

As I use the Original version of this tan for the most part it doesn't give a really dark colour at all. It just gives a natural glowing bronzed colour that is in no way orange. You can however apply the tan for a few days to build up to your desired colour but for everyday use I love just one layer of this as you just look simply radiant and healthy....now that's the look I desire!! Karora Original is €24.99 for 200ml or €14.99 for 100ml and is available pharmacies and salons nationwide. I buy mine from the local Doc Morris Pharmacy. It can also be purchased online.

I did use Karora on my face and neck previously but because I am on a skincare buzz at the moment I decided to use a self tanner specifically designed for this area as I did feel the Karora was causing breakouts on my SUPER sensitive skin. I used Clairns Liquid Bronze tan for face before and remembered loving it so I recently repurchased it and now I don't know why I ever stopped using this in the first place...its the business! I love the texture of this product, its like a milk formulation that literally dries in instantly so there is no waiting around. I have often applied my foundation straight after this and it develops a really lovely tan under your foundation and best of all it doesn't break me out....Whoop Whoop. 

Clairns do recommend using a cotton pad to apply this but personally I apply it with my finger tips and be sure to scrub my hands afterwards! Like the Karora original this can be used for a few days to build up the intensity of the colour. 

There is no doubt that I will be using this product for a long time to come, because to date this is the best facial tanner I have ever tried...WOW thats a steep statement but a true one none the less. Also the sheer size of the bottle (125ml for a facial tanner is pretty huge) means this baby will be part of my tanning collection for awhile yet. 

The main things I love about this product is how quick it dries, how natural it looks on the skin and it doesn't stink too bad at all which is always a great trait. 
IF I did have one thing to say about this tan combo it would be that after one application the facial tanner seems to develop darker than the body one so I usually either apply the Karora(body) for two days and on the second day skip the Clairns(face) or if I only want one application I will slightly exfoliate my face the morning after I apply the Clairns. There is a seriously minor difference in the colours but I am just being fussy here. Clairns Liquid bronze self tanning for face and decollete is €26 for 125ml (I bought mine from Boots), this little gem will last a long time as you need the tinniest amount.


Karora do have other products in their current range. These include a Karora Self Tanning Mist in Dark which is the darker version of the Original one. This is considerably darker but is great for nights out as it gives an intense colour. I have only ever seen this in the 100ml size which is the same price as the Original formulation. The Original tan is a tinted mist which can be used as a colour guide but the Dark one gives an instant colour so you can have your glow instantly and then the tan will develop as the hours go by. They also have a Gradual Bronzing Moisturiser with SPF 15 which is €19.99 for 125ml. This is like the Johnsons holiday skin phenomena that once was only a zillion times better. Its a really luxurious body cream that has some self tanning agents in it that allows you to layer this product for a few days to create a natural looking tan. This is great for fake tan virgins or personally I sometimes apply this if I want to extend the life of my Original mist. As if this wasn't enough Karora have mastered the art of instant fake tan also. This beautiful product is great for days when you didn't have time to use tan that develops over a few hours or if you just prefer to have a tan for one day rather than a few. I also adore this for applying over my tan on nights out to give a beautiful sheen to the skin and add some extra colour, especially on my legs and arms. A little gem in my eyes, this product is €14.99 for 125ml. Karora also offers the smooth operator micro peel which is a grain free exfoliator that is supposed to be amazing for removing dead skin cells and could even be used to remove the last of your old tan before bronzing up again. I haven't used this product yet so I don't have an opinion on it at the moment but it is on my wishlist and I will be sure to share my thoughts with you all when I do get my hands on it, this retails for €12.99(I think) for 100ml.

Well ladies thats all for the moment. I hope you found this post informative and I will be sure to fill you in with any new tanning favourites in the future although for the foreseeable future i do think I have found my tanning holy grail. Have a beautiful sun-kissed day. Take care.

Anita xxxx


****This was not a sponsored post****